
How To - Creating a Menu
-
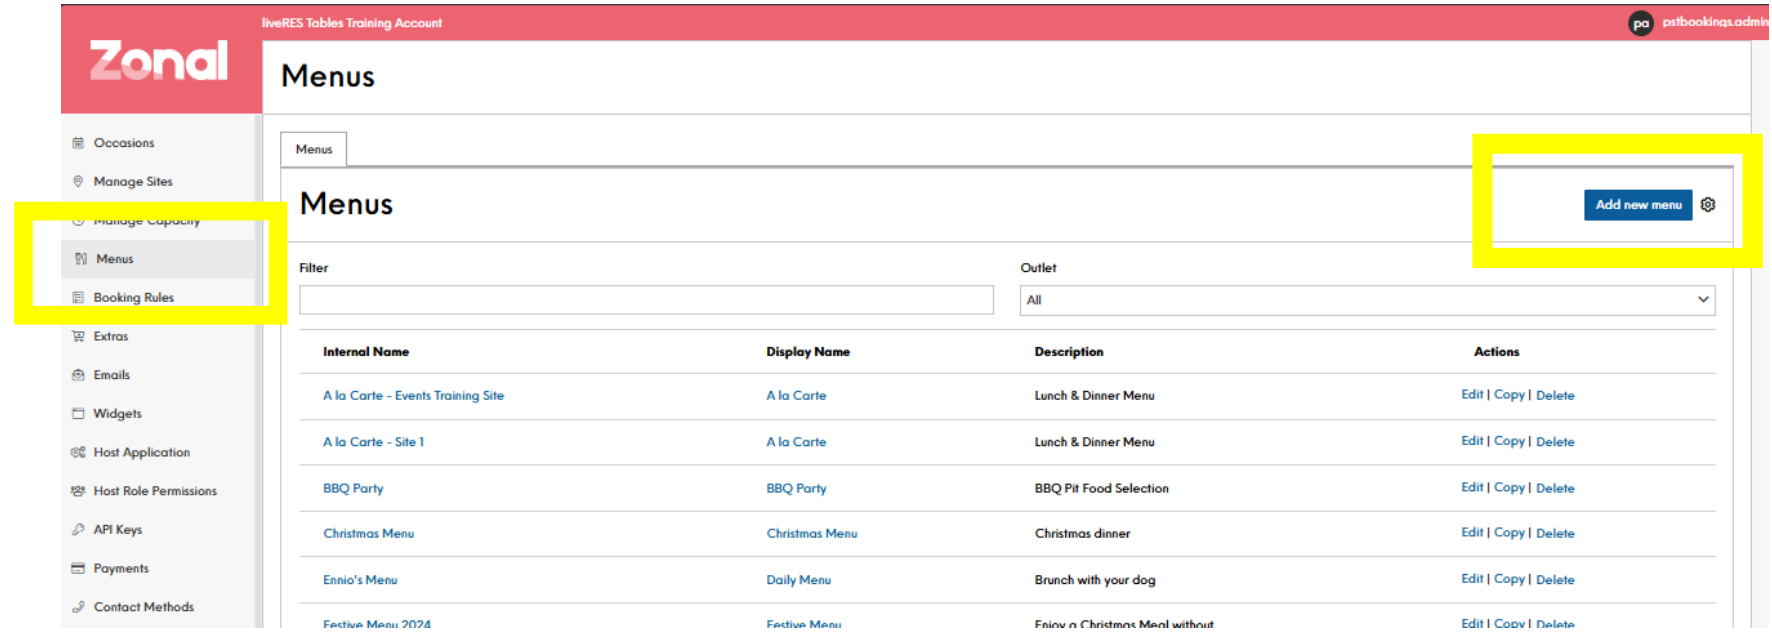
Go to the Menus section of the system.
-
Click the Add New button to create a new menu.
-
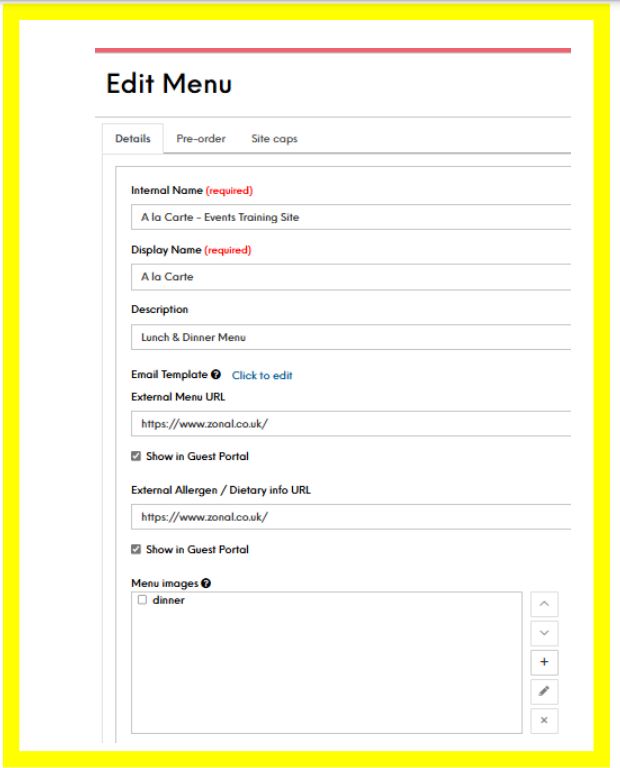
In the menu details:
-
Enter an Internal Name - this is for your own reference
-
Enter a Display Name - this is what the customer will see
-
Add a Description - provide details about the menu for customers
-
-
Scroll down to the Details tab
-
Set the Minimum and Maximum Covers allowed for this menu
-
Specify the Maximum Advanced Booking time and Minimum Notice
-
Select the Companies and/or Sites where this menu is available
-
In the Channels section, choose where this menu can be booked (e.g. online widget, API, host app)
-
In the Schedules section, set the date range and times when this menu is available, and the days of the week it can be booked
-
(Optional) In the Pre-Order tab:
-
Enable pre-orders and select the pre-order menus
-
Set the pre-order open and close dates
-
-
(Optional) In the Site Caps tab:
-
Configure any caps on the number of bookings or covers for this menu
-
-
Save the new menu.
-
Once created, you can then link this menu to an occasion(s) so that customers can select it during the booking process.
The key things to consider are defining the menu details, availability, and any special requirements like pre-orders or capacity caps. This ensures the menu is configured to meet your business needs and presented accurately to customers.